
Optimising photographs using MS Photos and Apple's Preview
 Posted: 15 March 2021 by: Leeroy Lugg.
Facebook /
WhatsApp /
Bluesky /
Mail
Posted: 15 March 2021 by: Leeroy Lugg.
Facebook /
WhatsApp /
Bluesky /
Mail
give or take.
Before uploading a large photo to your website, it's a good idea to optimise it first. In this post, we will learn how to shrink the dimensions and file-size of a photograph. Optimising images before uploading will improve page loading times, save space on the server and speed-up your website editing workflow.
Tools and file types
We will not be using 3rd party photo editing apps, just the standard image editing tools available with Windows and Apple Mac operating systems. There are many image file types, jpg, png, gif, bmp and raw, to name a few, but we will keep things simple and focus on photographs saved with the .jpg or .jpeg extension.
Using Windows 10 'Photos'
There are a few ways to open up the 'Photos app'. The quickest way is to double click on your jpg image file. Doing this will open your selected photograph in 'Photos'. You can also open 'Photos' by right-clicking the file and then choose 'Open with Photos'.
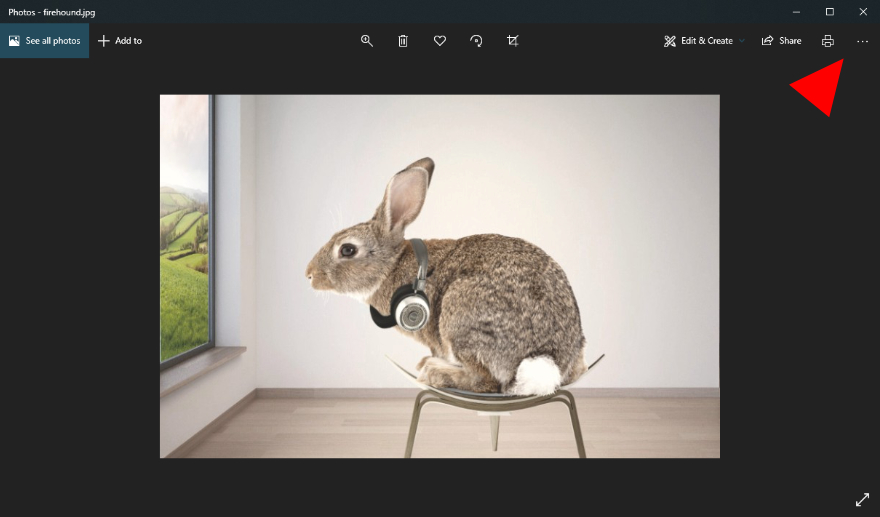
To resize your photograph, click on the three dots, top-right.
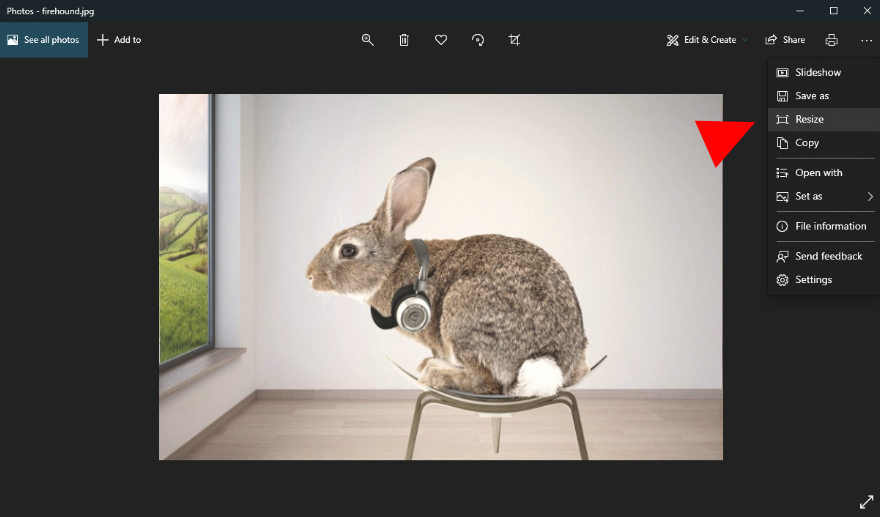
Next, click 'resize' from the drop-down menu.
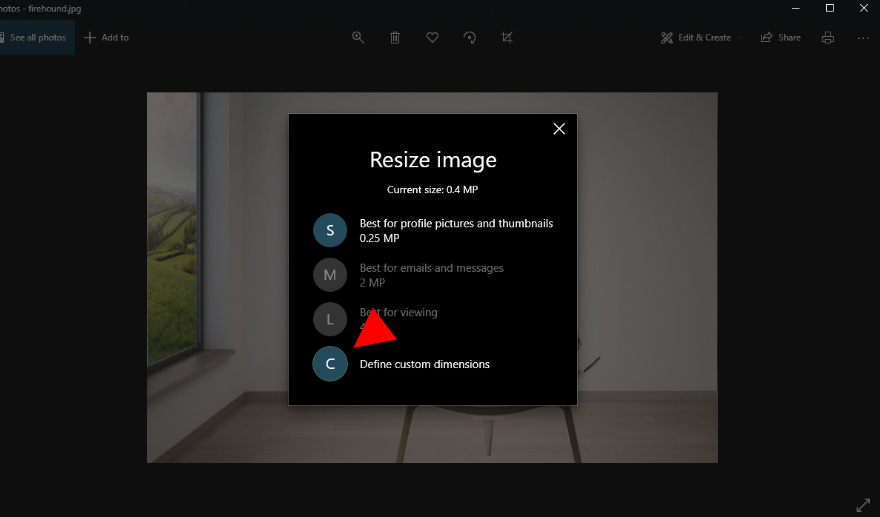
We will resize the photo using custom dimensions, so click on 'Define custom dimensions' as in the following screen.
We can adjust the size of the photo by only changing the image width. Ensure that the 'Maintain aspect ratio' option is checked and then adjust the image width. Try setting the width to 900px. The app will automatically calculate the correct height based on the photo's aspect ratio. Finish by saving a copy of your image.
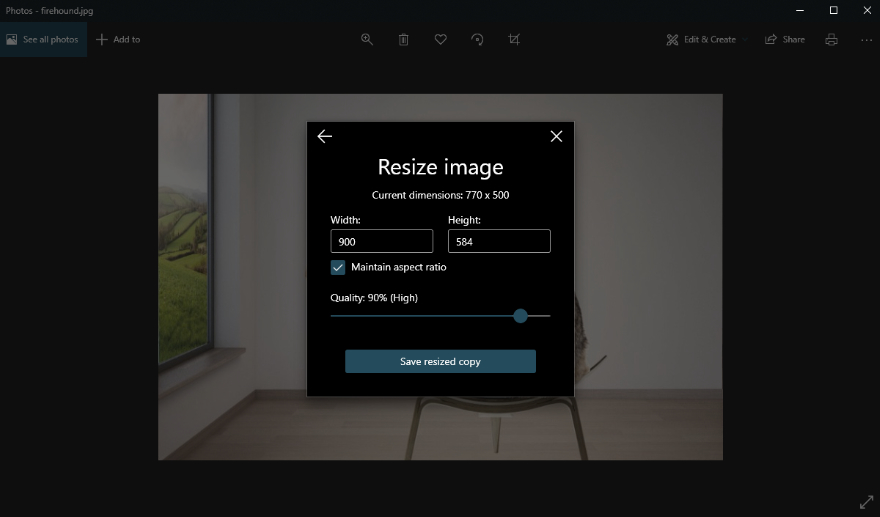
Your new image will now be smaller in terms of dimensions, as well as file-size. Your photograph is now ready to upload to your website.
Using Apple Mac's 'Preview'
The Mac OS has a helpful (or unhelpful) autosave feature that saves your work as you make changes and edits. You may wish to keep the original photograph, so let's make a copy of the file and work with that.
To make a copy of your photograph, right-click on your .jpg file and select duplicate. The duplicate file will be created and will appear alongside the original. It's a good idea to rename the new file to something more useful.
Launching 'Preview'
There are different ways to launch the 'Preview' app. The quickest method is to right-click on your jpg file and select 'Open with Preview'.
Your image will be displayed in 'Preview'.
Depending on your preferences, you may or may not see the editing toolbars (toolbar and markup toolbar). If the toolbar is present, click on the pencil icon, this will reveal the 'markup toolbar'. The markup toolbar displays various editing options. Click on the 'Adjust size' icon.
If toolbars are not present, activate them via 'View' or instead skip the toolbars completely and go to 'Tools > Adjust size'.
We are going to resize the photo using custom dimensions and start by making the following adjustments:
- Set the 'Fit into' option to 'Custom'.
- Set width and height to pixels.
- Ensure that the 'Scale proportionally' and 'Resample image' options are ticked.
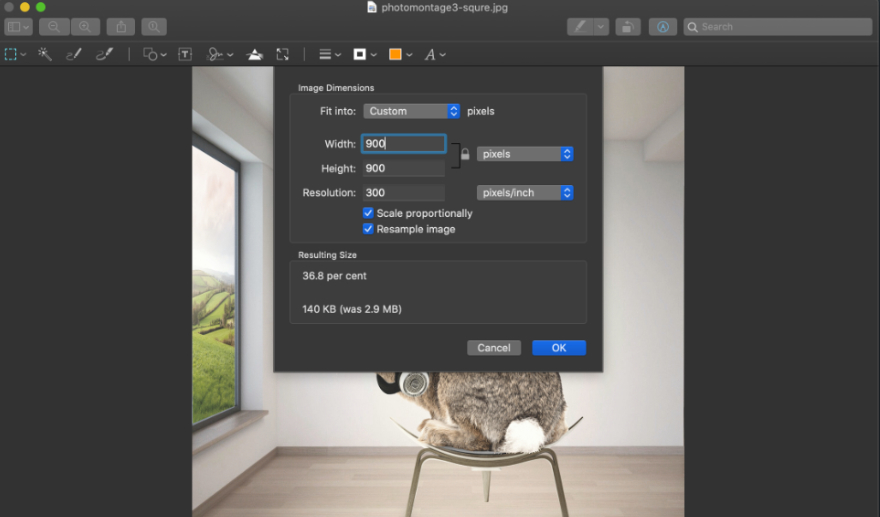
We only need to change the width of the image; try setting it to 900px. Note the resulting file size, in this example we have reduced the size from 2.9MB to 140kb.
Finally, click the ok button.
The dimensions of your photograph, including the file size, will now be reduced. It is now ready to upload to your website.
Update: if, after resizing your images, they still have a huge file size try using https://imagecompressor.com.
In a future post, we will take a closer look at image file types and aspect ratios.
View the original Rabbit Montage image.
Comments are closed on this post.